Project Development Blog Entry
In this page, I will:
Briefly describe my team chemical device
Show how the team planned, allocated the tasks, and executed the project.
Document the entire design and build process of the chemical device and include videos, pictures, and screen captures of the processes.
Include “Hero shot” of every milestone of the processes, example the part A that was 3D printed, part B that was laser-cut, electronics components moved/worked according to the program. Hero-shot is taken with the person-in-charge holding/working/making the parts.
Include the name of the person who was in-charge of every part of the project.
Document my individual contribution to this project.
Provide the link to the page of the blog of my teammates. Describe problems encountered and how the team solved them.
Include all the project design files as downloadable files.
Embed the final prototype design file, i.e., the final fusion360 design file showing the entire prototype.
Type my Learning reflection on the overall project development.
Our team Chemical Device
In this section, I will briefly describe my team chemical device.
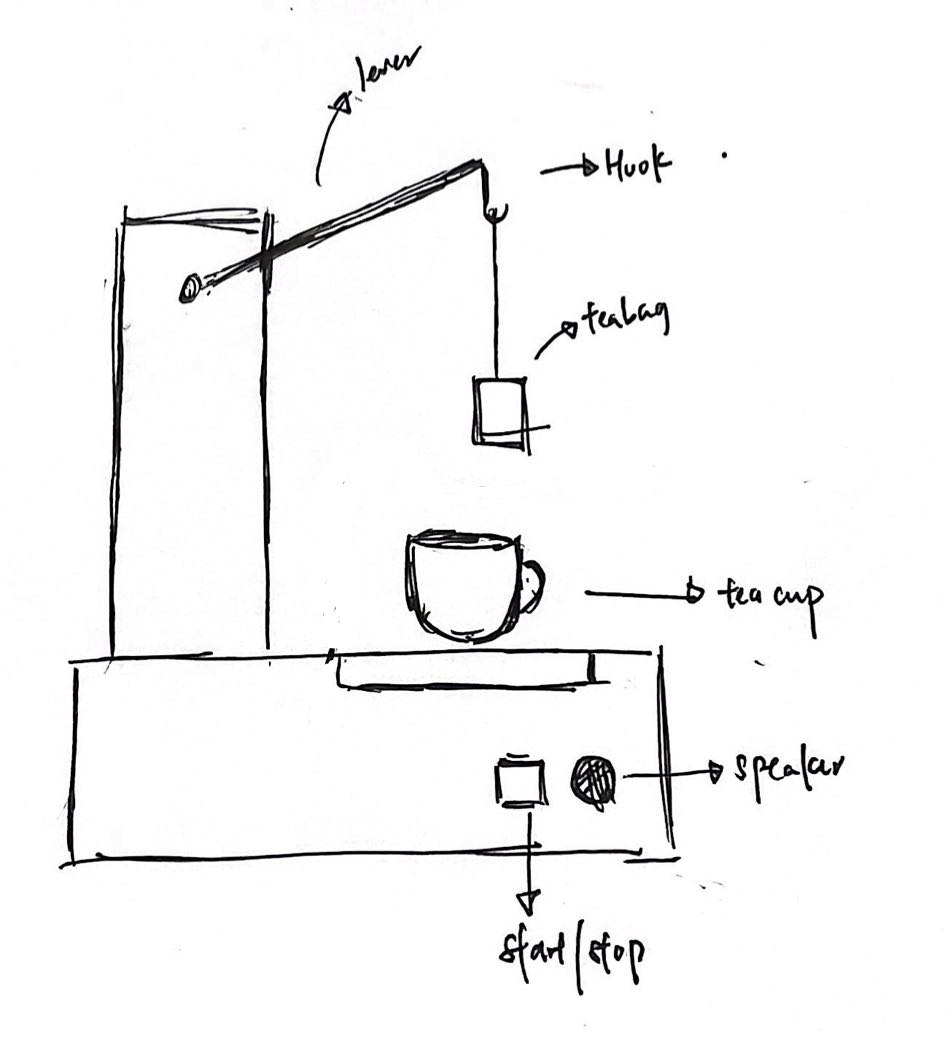
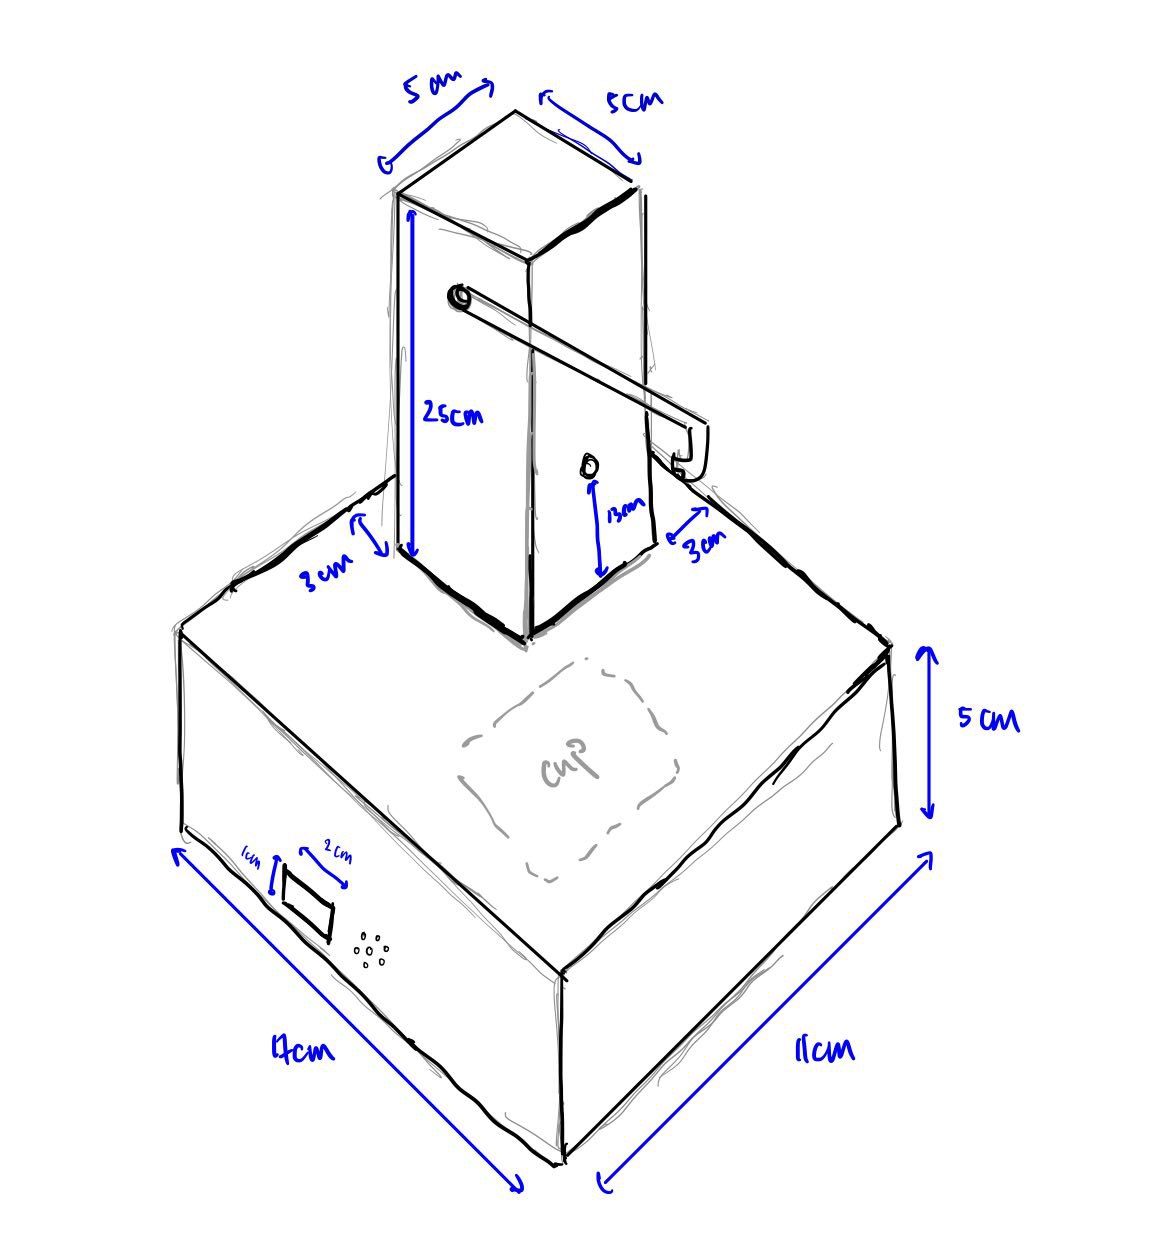
My team’s chemical device is a tea maker. It aims to allow user to achieve an ideal cup of tea in a convenient and safe manner. While at the same time, be small, compact and easy to use.
What it is. What problems will the chemical device solve?
It is easy for anyone to make tea but how do we make the perfect cup of tea every time we want? The teamaker that my team has put together can help counter this problem of having the perfect cup of tea at the right temperature, concentration, and volume. As it is also self-operated, users can simply prepare a cup of water and tea bag as usual and let the device do its job, bringing convenience to our everyday lives, especially for busy working adults.
Below is the hand sketch of the chemical device.
1 point perspective sketch
2 point perspective sketch
Team Planning, allocation, and execution
In this section, I will list down my team member's name and their respective roles (CEO, CFO, COO, CSO)
CEO: Kieron
CFO: Ruba
COO: Cheryl
CSO: HongYi
I will show the finalized BOM (BILL OF MATERIALS) table.
Bill of Materials (BOM) Template
I will show the finalized Gantt chart (planned and actual) and the tasks allocation for each team member.
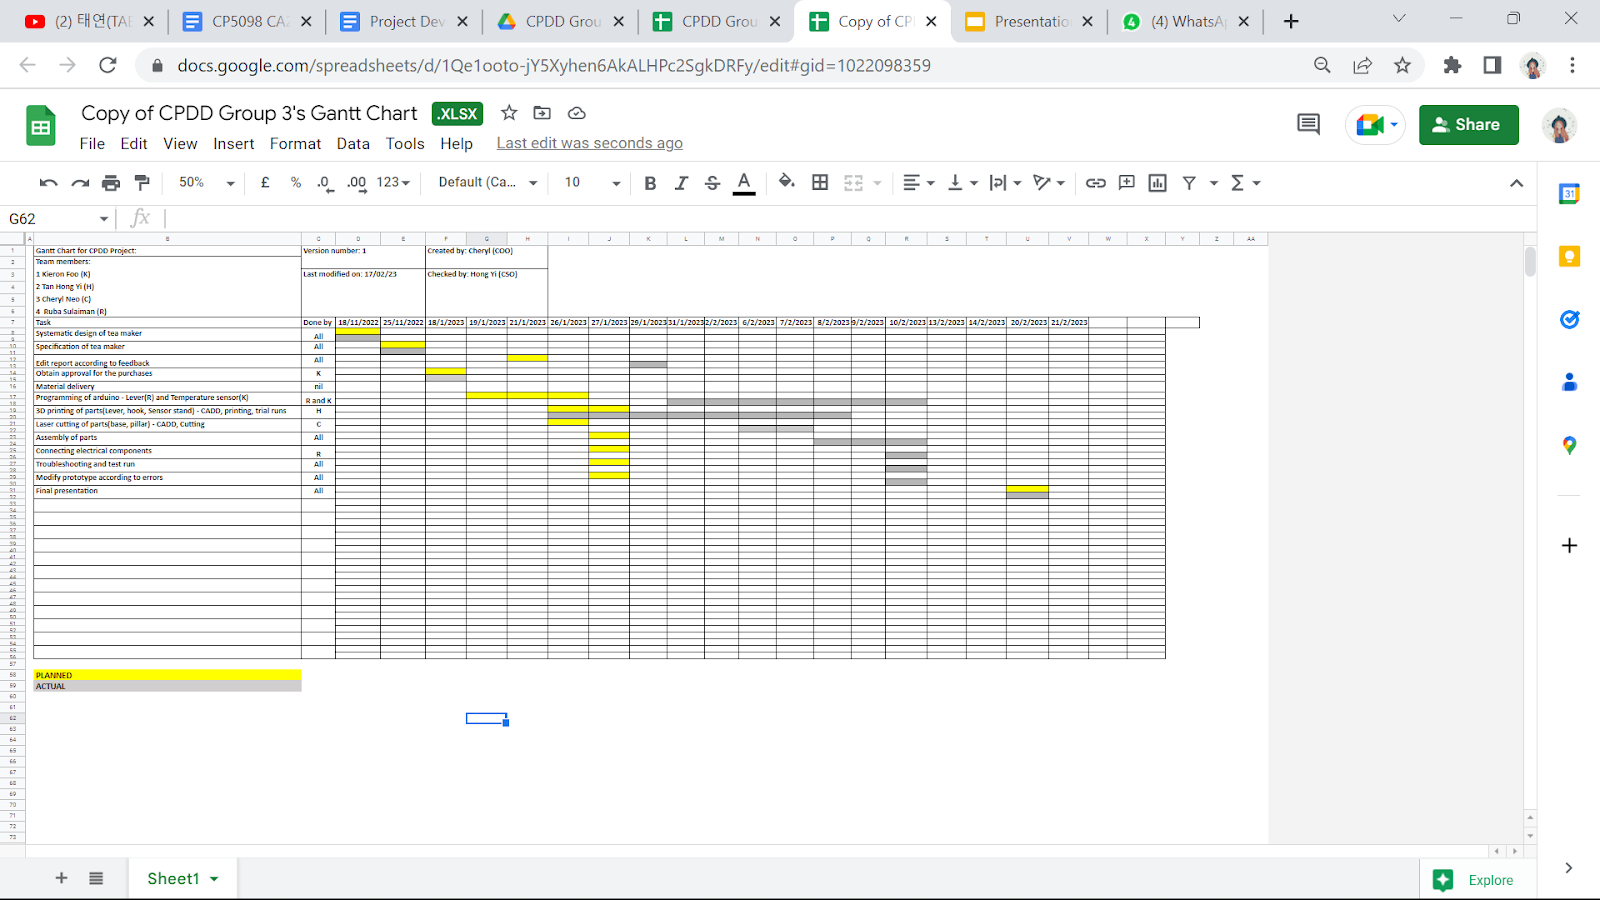
click here for original Gantt chart: https://docs.google.com/spreadsheets/d/1-s-6jWN0HqQdbsbifCI8NBMut5YEkiNO/edit?usp=sharing&ouid=115978123840026443109&rtpof=true&sd=true
Design and Build Process
In this section, I will provide documentation of the design and build process.
Part 1. Design and Build of 3D printing (done by Hongyi).
https://cp5070-2022-2b04-group3-tan-hong-yi.blogspot.com/
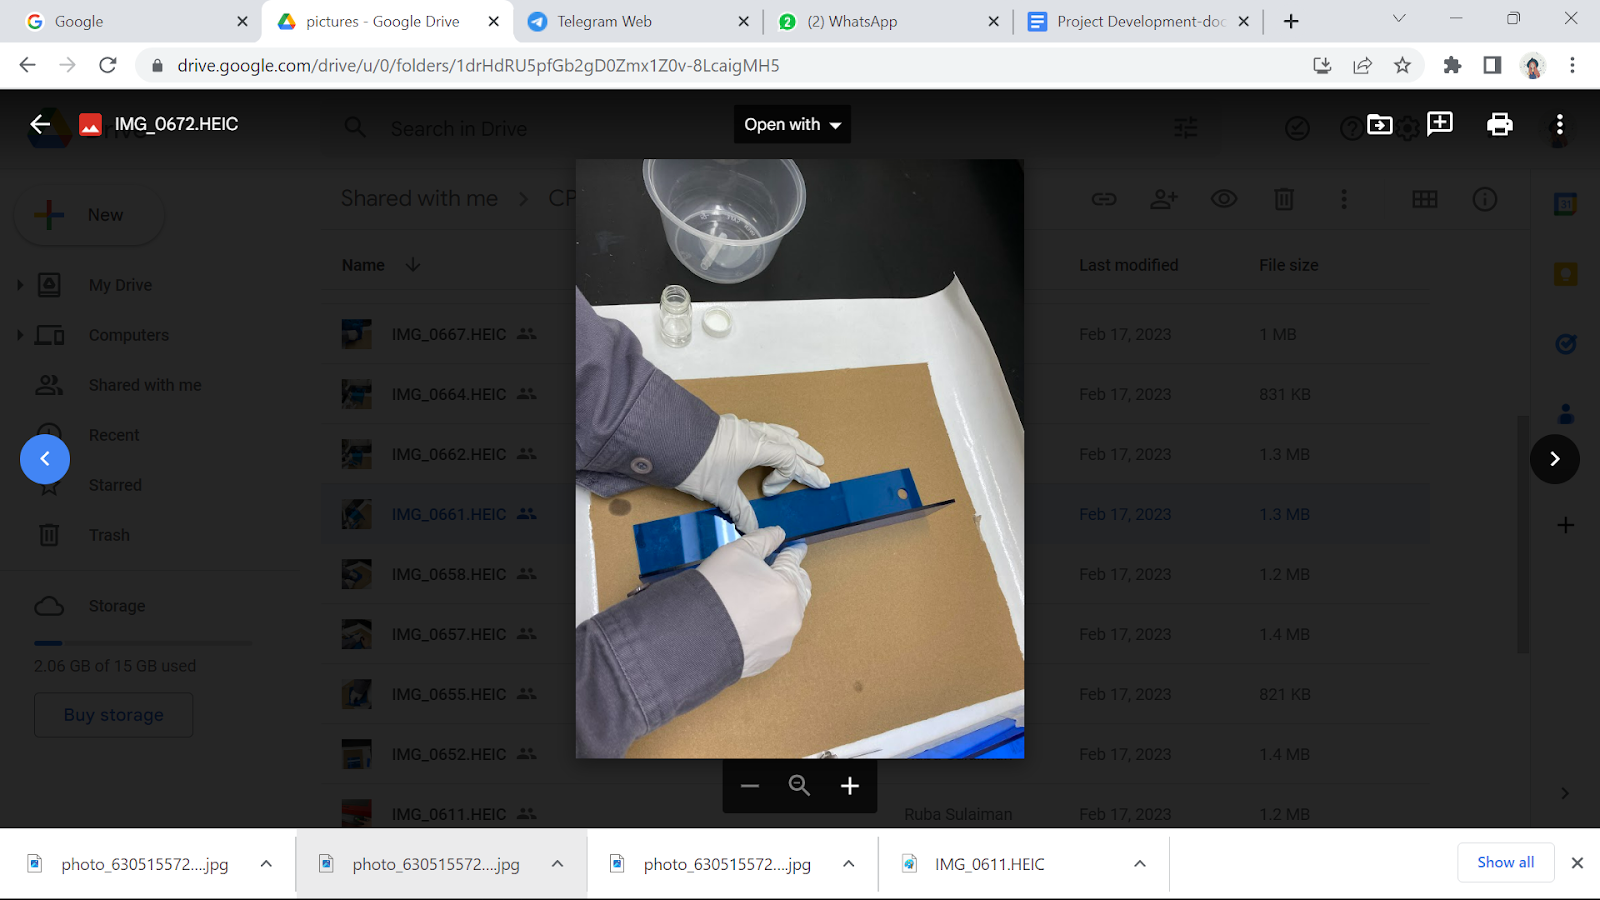
Part 2. Design and Build of laser cutting (done by ME, Iron-man)
This is the process of laser cutting
we first had to make a cardboard prototype to make sure the dimensions of the hole we want to cut. We had a difficult time deciding where the temperature probe should go so that took a bit of discussion before we can finalize it.

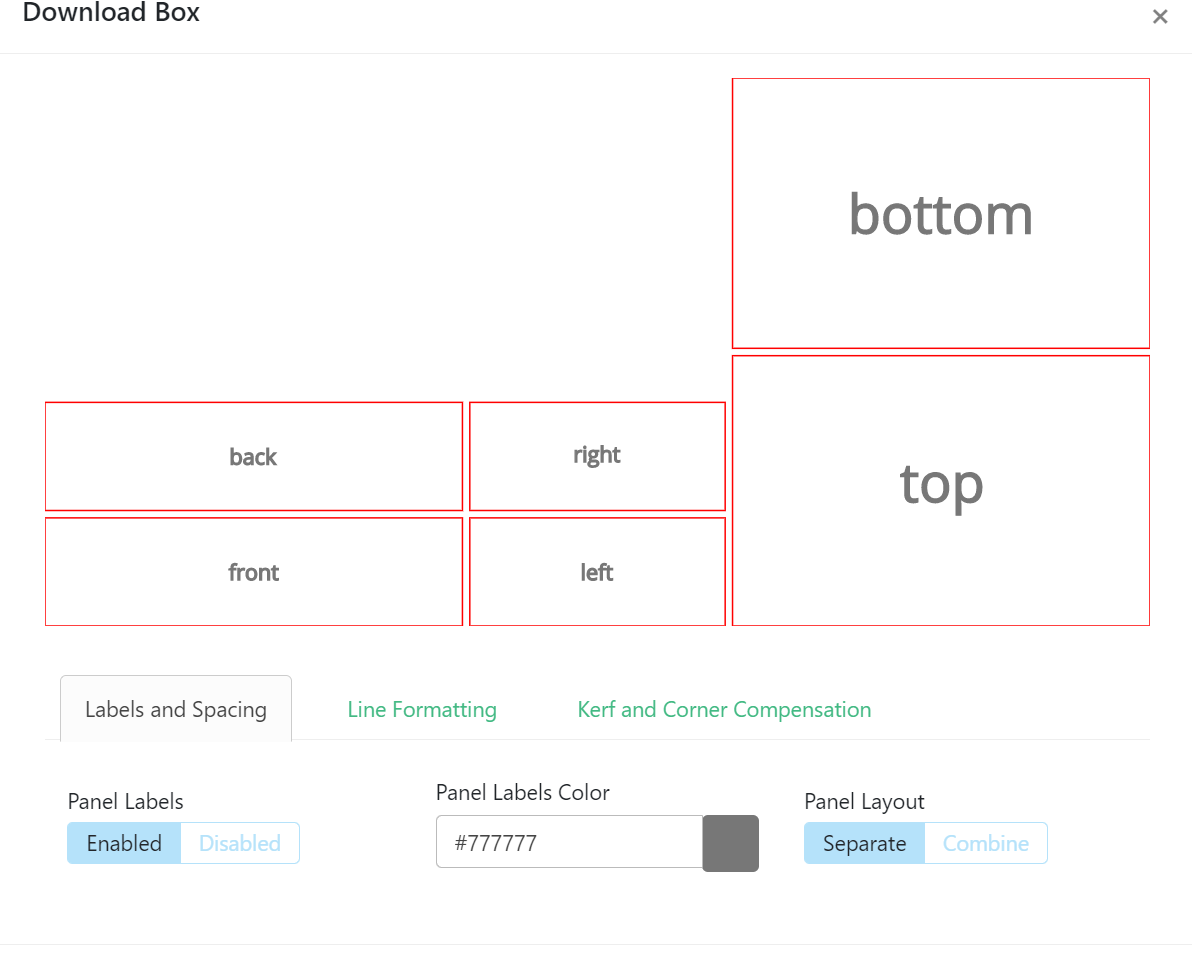
After ensuring the pieces were exactly how we want them, I made use of this maker case website to help me make the dimensions of the pillar and the base which they also considered thickness of the acrylic we had which made it more convenient for us.

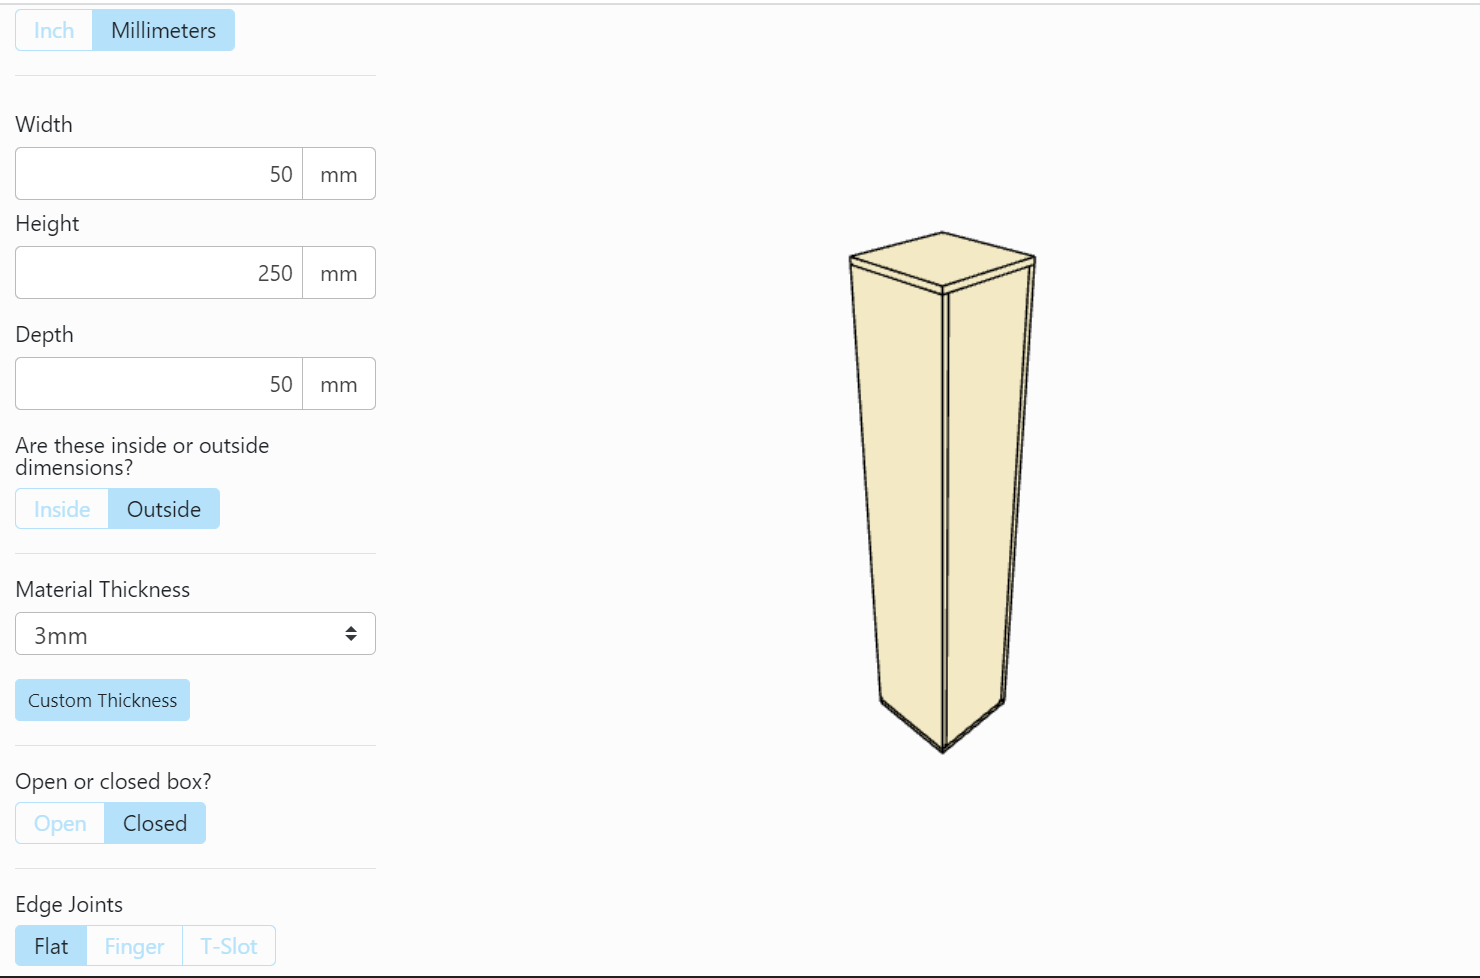
I tried to calculate the dimensions that needs to be cut on my own, but it wasnt the most accurate

Download the makercase file in dxf format and import over to fusion
On fusion itself, I had to cut the holes as shown which we discussed from the cardboard prototype

When actually laser cutting the acrylic, we referred back to our blogs which have the necessary SOP. This helped us tremendously as there were no one there to help us laser cut, so having an SOP helped to guide us accordingly - it also showed reminders like not to look at the laser.


The laser cutting process took about 20 mins with 15 mins of cutting
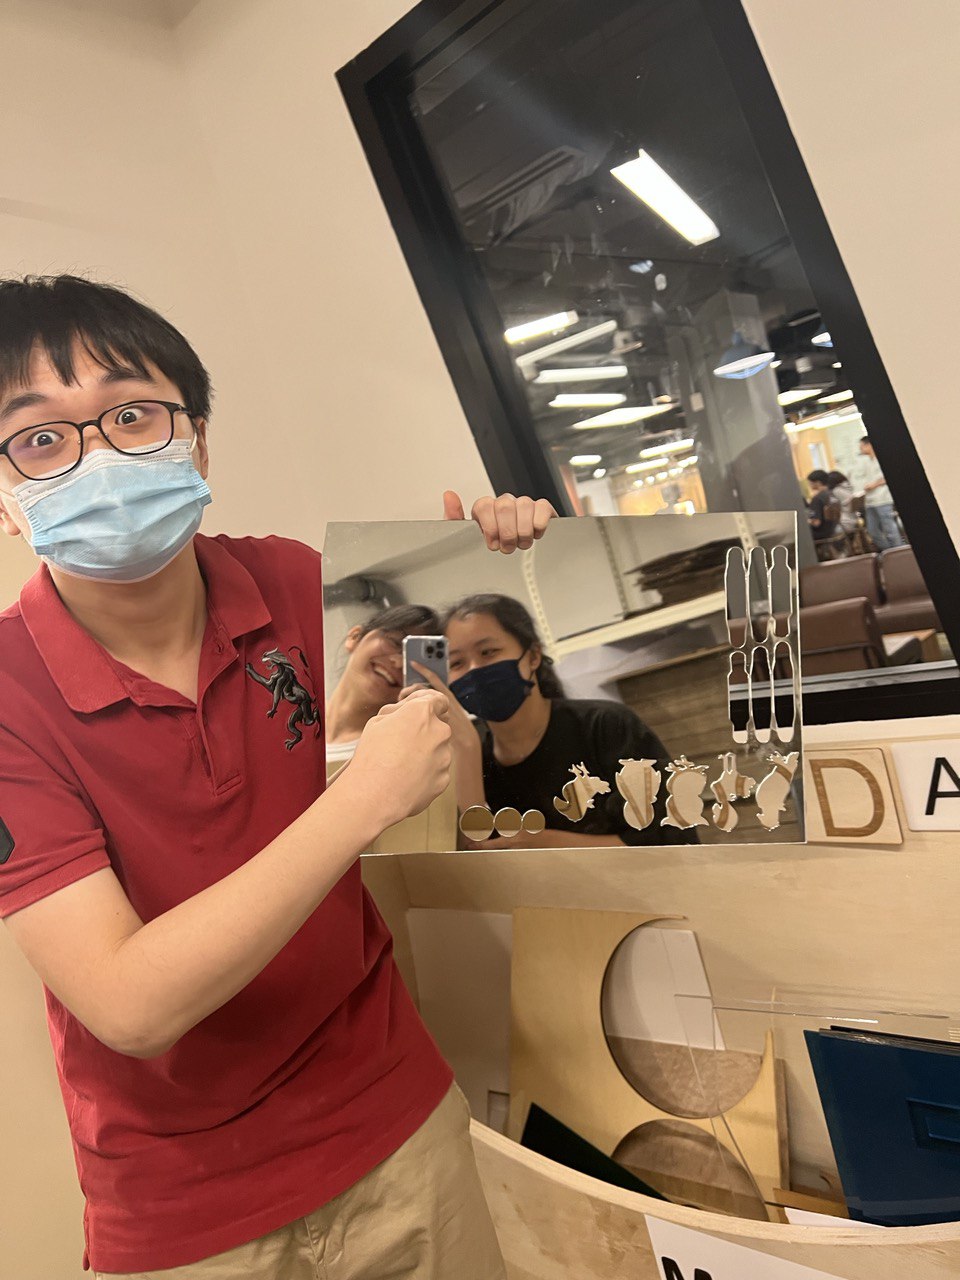
The finished print

The following steps were just gluing the pieces together. And this was done quite some time after laser cutting as not all pieces can be glued together first. We wanted to install the wires and Arduino board before gluing it. But there were some loose pieces that were still glue-able and hence we glued them in advance.
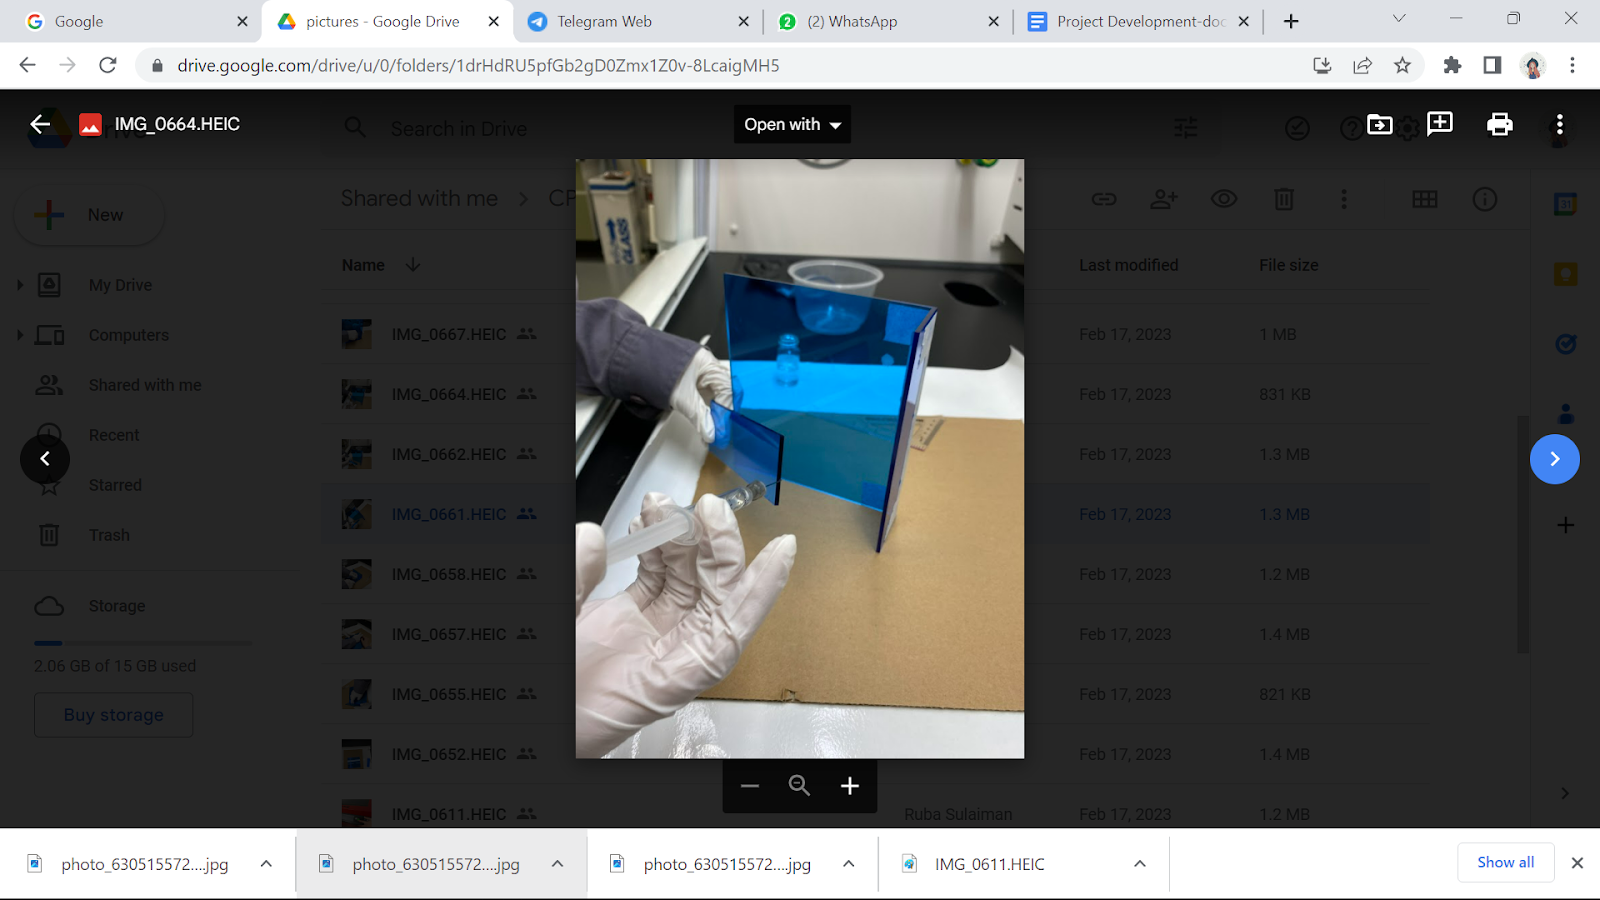

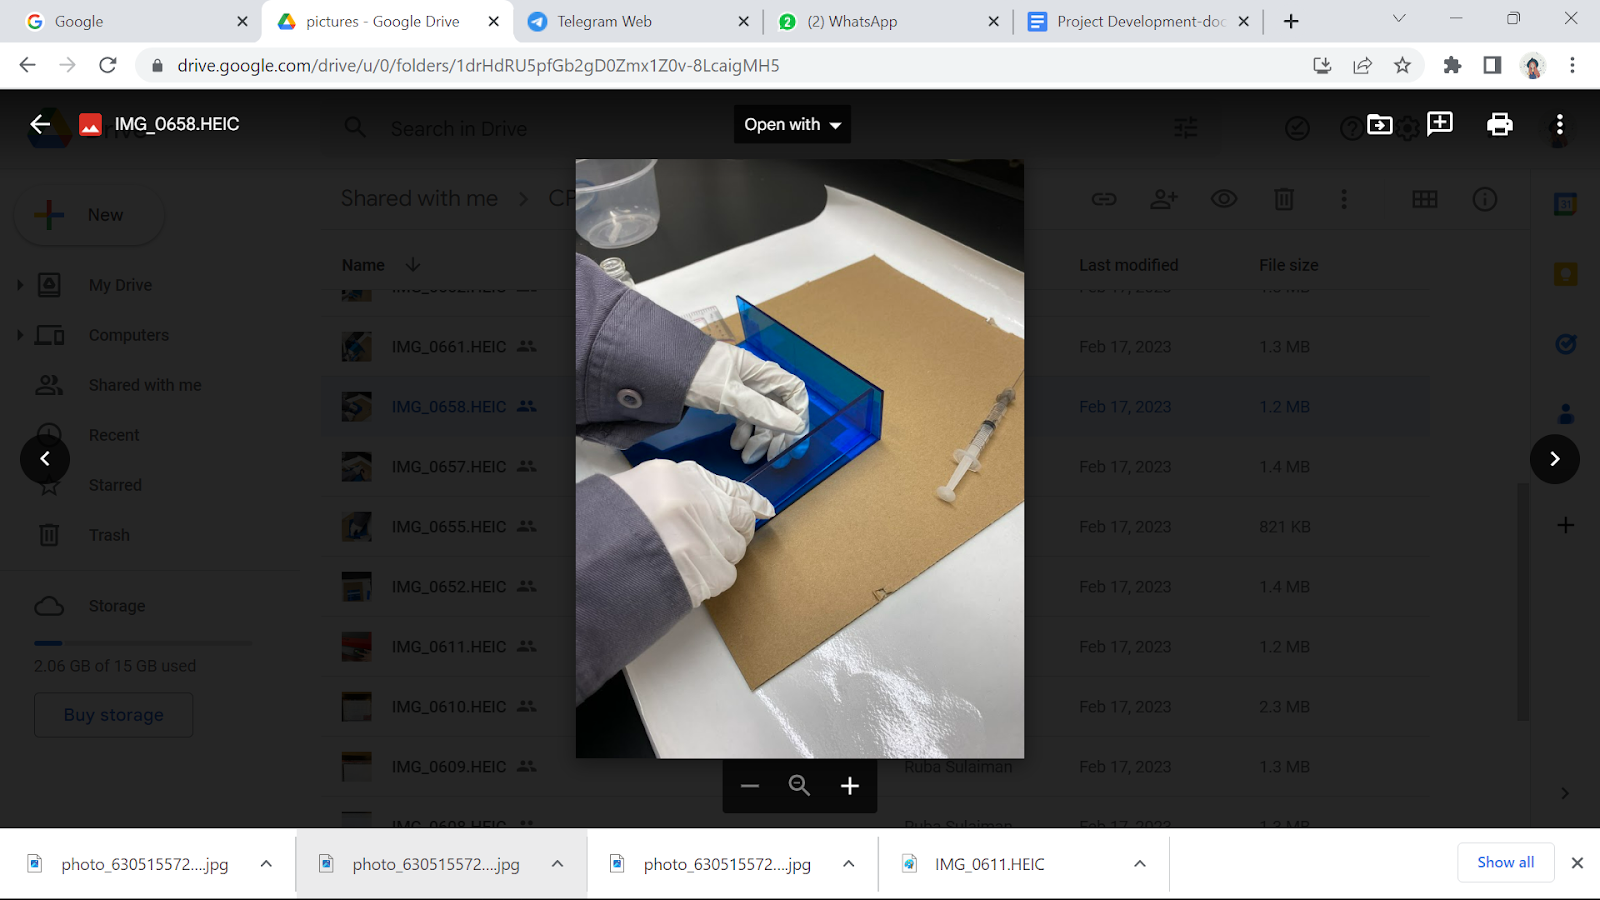

Final product

link to images: https://drive.google.com/drive/folders/1drHdRU5pfGb2gD0Zmx1Z0v-8LcaigMH5?usp=share_link
Hero Shot

Part 4. Programming of servo and temperature sensor (done by Ruba and Kieron).
https://cp5070-2022-2b04-kieron.blogspot.com/
https://rubasulaiman156.wixsite.com/cp5070-2022-2b04-gro
Part 5. Integration of all parts and electronics (done by___us___)
Documentation for integration.
Gluing the base

Installing the arduino

Shutting the tea maker
Hero shot for integration.

Problems and solutions
In this section I will describe the problems encountered in the design and build process and how the team solved them.
Lever
The first issue of the lever is determining the length. We had to obtain the optimal length of the lever in order for it to carry the teabag in and out of the hot water. Using the principle of moments, more force is needed for the same moment if the lever length is short hence, using a longer lever would be better.
Additionally, it was a challenge to determine the diameter of the hole to attach the lever. This is because the lever has to sit securely on the servo to carry the teabag. If the attachment is loose, the lever is unable to move (it will droop down) no matter how much torque the servo provides. Due to the wear and tear of the lever, it often comes loose and is unable to carry the teabag after 2 or 3 tries and this is not feasible.
Hence to solve our problem, we decided to use a servo with a stronger torque, as well as a screw to secure the lever into the servo.
Arduino
The main issue of the Arduino is the temperature sensor and servo not working together, as well as making the servo loop once the way we want it to
When done on separate Arduino boards, the temperature sensor can react when it senses a specific temperature and the servo is able to move how we want it to. However, the 2 Arduino boards are unable to communicate with each other and hence, we decided to use only one Arduino board. This allowed the temperature sensor to sense a specific temperature before sending a signal for the servo to descend the teabag.
Additionally, it was also difficult to make the servo behave like we want it to. after doing the loop code, the servo often vibrates further causing the lever to jerk. Oftentimes, it also continues the loop multiple times (it is only supposed to do once). We found out that the reason for this was because the servo is constantly wanting to move but it is coded to stop. Hence, the jerking motion of the lever. Furthermore, after the loop is done once, the temperature is still in range as mentioned in the code and hence, it does another loop again.
We fixed this problem by researching and asking around how to code the Arduino correctly and after many trials and errors, the code is completed the way we want it to be.
Reassembling
The main issue of reassembling is more towards time constraints. As assembling is done last, it was crucial that all the components are in the right condition.
Project Design Files as downloadable files
In this section, I will provide all the design files (Fusion360 files, .dxf files, .stl files, arduino programs files) as downloadable files.
link to all files: https://drive.google.com/drive/folders/1eQMfqpbbop8s4fjV94Td3T_cYyNmWEU6?usp=sharing
Below is my Learning Reflection on the overall Project Development.
This overall project was a long and tedious one and through this, I have gained so much experience, lessons, knowledge, and skills. Initially, this project felt manageable to complete as my teammates were hardworking and we all contributed significantly during the discussions. However, there were many ups and downs in this project. As the Gantt chart has mentioned, some tasks took longer than planned like the programming, 3D printing, and assembly of parts. This is not entirely due to our procrastination but because we faced many challenges and failures in the process. For example, we were unable to get the Arduino coding to work like we wanted to. The plan was to have the lever of our tea maker go from a high start position angle and have it travel down slowly, wait for 3 mins, and rise up. Meanwhile, still communicate with the temperature sensor to know when the lever should descend. Kieron and Ruba were tasked to program with Kieron programming the temperature sensor and Ruba programming the servo that controls the lever. However, after many tries and failures, the temperature sensor code and the servo cannot work together. We resorted to using only 1 Arduino board to solve our problem. Additionally, due to the delay in the programming, we were unable to glue the pieces of acrylic that we laser-cut together. This is because we wanted to build in the Arduino and wires first to easily assemble the product as compared to gluing it before the connection of wires in the tea maker. hence, the gluing of acrylic took much longer than we expected. This was also the same problem for 3D printing. Hongyi who is tasked to do the 3D print had to ensure the pieces fit perfectly such as the lever which was also another of our major problems. From the CAD, a hole is made for the lever to connect perfectly but after many copies printed, it was still loose and we do not know why. It could possibly be the grooves were subjected to wear and tear after rotating. This was a big problem as the lever was not strong enough to hold the tea bag and thus, was not able to bring it up or down. In the end, we resorted to using a stronger servo and adding a screw to secure the servo in place. This process of getting the system of the tea maker to work was the most difficult task. It can be seen that one person’s failure would lead to a delay of all other tasks which could make us miss the deadline for the project completion. It is also this that I feel made my group really stressed as we were or mentally, physically, and emotionally challenged after all the high hopes we got seen crashing down. The constant failure to complete a task in the timeline is also another factor affecting the morality of the group. After all, we did not give up despite all the setbacks we faced and chose to rise against the adversities to complete the project as best as we could.
In addition to the above, I have also touched on much of the knowledge I learned in the past modules I have taken. While making a cardboard prototype, we took back the knowledge of cardboard joinery which allowed us to make a model of our tea maker that we used to see if the lever could withstand the weight of the tea bag. We also used it to trial and error where the temperature probe can be positioned. Additionally, other topics like laser cutting were also used in this project and one thing that helped me the most was referring back to old blog posts. This, I felt and realise, was a very fun and different way to take down notes which can easily be referred back to as it is digitalized. The COWS matrix I learned in year 1, Materials of Design module, and drawing in 1 and 2 point perspectives were also reused. On top of that, there were new things we learned that I strongly believe I would put to use in my future projects too. For example, using the Gantt chart which has reminded us to keep to the timeline and put us on track. The TRIZ we did to further improve our tea maker was also a skill I learned that helped us enhance our tea maker. In the future, I can see myself using TRIZ for other projects be it in school, capstone, or during internship.
I have also taken back many skills, both technical and interpersonal, from this project. Through this project, I had the chance of glueing acrylic using acrylic glue which took me many tries to get the pieces glued on and secured. I also gained people skills as countless amounts of discussions were needed to make this project work. Our device has gone through many re-corrections and setbacks and this forced us to come together as a group to discuss what we should do. There were of course contradicting ideas and arguments involved but we were able to understand each other in the end. This was when problem-solving was pivotal to solving our problem and I am glad to contribute ideas for the refinement of our tea maker. For example, The lowering of the teabag was a concern as our device, which is focused on being compact, was a little shorter than expected but a regular tea bag was too long. Some ideas contributed to this problem was tying a loop at the string of the teabag but we felt that it wasn’t very user-friendly and hence we suggested that the lever start position could be higher. The speed of the servo rotating can also be slowed to prevent the teabag from coming out of the cup and splashing hot water around. The temperature probe was also not aesthetically pleasing and hence we chose to add a small clip that the user can easily clip on or remove so as to make it look organized and neat.
All in all, I feel that this project has given me a glimpse of how capstone could possibly be. I was glad that through these difficult times, we became closer as a team as a lot of time was spent in the lab together. There were times when giving up seemed like a good choice but we persisted as we all wanted our device to work. Through this experience, I was also able to gain new skills which I strongly believe I will use again in the near future and even after I graduate. Some areas of improvement which I feel can be done are perhaps clarifying our doubts or gaining insights from the lecturer, getting inspiration from research, communication skills, and planning our time properly.
No comments:
Post a Comment