Laser Cutting Documentation Blog Entry
1. These are the 4 important hazards and the respective safety control measures on the operation of laser cutting machine:
Hazards | Safety control measures | Pictures to support the explanation |
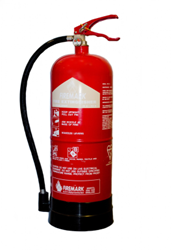
1. Printed materials can catch on fire while printing, especially wood | Fire extinguishers are located near the laser printer that can be used to put out the fire. |
 |
2. Unwanted fumes/smoke is produced while laser cutting which can lead to a fire | A fume extractor is used and connected to prevent the accumulation of smoke and gases in the laser cutter |  |
3. Materials in the laser cutter can cause flare-ups | Air compressors acts as an air assist and is used to blow air onto the path of the laser to remove smoke and debris |  |
4. Radiation from the laser can cause damage to the user | The cover of the laser cutter prevents radiation from reaching the user. It is also equipped with a safety interlock which shuts down the laser cutter when it is open. | 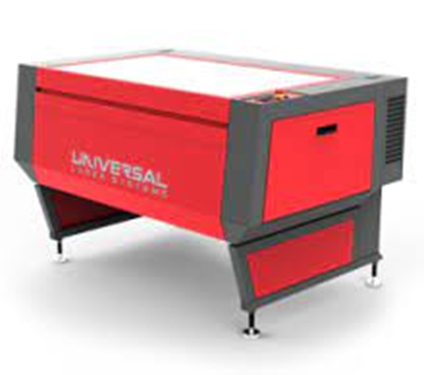 |
2. Below are the materials that can be cut/engraved using laser cutting machine in FabLab.
Material | Photo of material |
1. Wood |  |
2. Acrylic |  |
3. Cardboard |  |
4. Paper |  |
Below are the materials that can’t be cut/engraved using laser cutting machine in Fablab.
Material | Photo of material |
1. Metal |  |
2. PVC |  |
3. Foam |  |
4. Rubber |  |
3. Below are the steps on the operation of UNIVERSAL laser cutter machine in FabLab:
a. Starting the compressor, turning on the laser cutting machine and fume extractor.
Steps and description | Photos to support the description |
Locate and turn on the power for the laser cutter |  (fablab) |
Switch on the fume extractor and compressor | 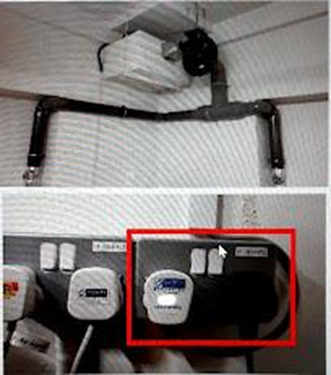 |
Locate the fire extinguisher |
 |
b. Importing a .DXF file to coreldraw and modify the lines/fill for cutting and engraving.
Steps and description | Photos to support the description | |
In the CorelDraw software, click select file > import > select .DXF file > import |  | |
Position the designs close together at the top left-hand corner of the material | 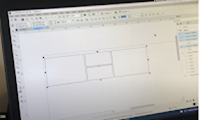 | |
Make sure measurement of design will fit on the material, that will be laser cut, using the ruler in the laser cutter |  | |
Make sure material has no paper | ||
Select which one to vector cut, engrave or vector engrave | ||
|
c. Sending the coreldraw drawing to laser cutter software and setting the laser cutter power, speed, PPI in the software.
Steps and description | Photos to support the description |
On Coreldraw software, select file > print | 
|
Under general, click the settings wheel under printer |  |
Universal’s material settings will appear then click on LOAD for more settings | |
Select the presets that matches your material type and thickness and select OPEN |  |
Check before printing · Anything red or green color should be at rast/vect mode · Power: Usually lower than 50% · Speed: Slower time is more desired (≅ 5%) · PPI: ≅ 1000 · Z axis: Usually determined by how thick your material is | |
Click Apply > OK once done checking | |
Dialog may disappear, click on the UCP icon (red box with a white line in the middle) |
d. Starting the job on the laser cutter machine.
Steps and description | Photos to support the description |
On the UCP, click on the power button on the top right to activate laser cutter. If power button is green before activating, off and on the power button. |  |
Test the 4 essential tools buttons: |  |
Zoom: Scroll the mouse to determine if its working | |
Press the green play button either on the UCP or laser cutter machine to begin printing | |
DO NOT look at the light in the laser cutter | |
Glance at the print once in a while to monitor the cut |
e. DOs and DONTs when there’s flame/fire on the material being cut.
DOs and DONTs | Photos to support the description |
DO try to blow it out if the flame is small |
 |
DO inform the TE ASAP |
 |
DO press on the emergency stop button |
 |
DON’T leave the flame and walk away |
 |
4. Below is my Learning Reflection on the laser cutter activities
This practical has shown me how laser cutters play an important role in developing designs and products. Initially, I was new to the topic of laser cutters and never knew how such a device operated. However, after what I've gone through, I realized that using the convenience laser cutters brings about when developing products and designs. the laser cutter took an estimated time of 5 seconds just to cut and engrave a small design on the acrylic board that was given to me. The systems and software like CorelDraw were easy to operate as well. By following the steps written in my SOP, I managed to print out a design on the first try successfully. This brought me back to CP5065 Introduction to chemical product design, in which we had to use cardboard to build our prototype for our chemical product (a water heater). While building the cardboard prototype, my group and I had trouble cutting the grooves of the gear accurately. With a laser cutter, we could have easily cut out the exact parts of our water heater like the gears, body, and frame, and put it all together. This way, the design of our prototype would look neater and more like a replica of the actual design which would actually work.
This practical has also shown me how important it is to ensure that the user is familiar with the steps of operating a laser cutter. Before being able to use the laser cutter, we were tasked to complete the relevant courses in FABLAB to ensure that we knew the basic precautions, hazards and what to do when accidents happen. Some examples include ensuring where the fire extinguishers were located, ensuring the fume extractor and air compressors were switched on, and ensuring not to look at the laser while cutting for a long duration. These were important precautions to take note of as not following these steps can cause injuries and accidents to occur very easily. In addition to that, there were important steps to follow that ensure the laser cutting goes smoothly such as changing the width of the drawing to hairline, checking the power, speed, PPI, and z-axis.
Using the laser cutter has proved how much technology has advanced throughout the years, making it easy for us to design and develop accordingly. The laser cutter plays a pivotal and helpful role in the prototyping stage of product development as it is not only fast but accurate. Although, in my opinion, it is more complex and dangerous to operate as compared to the 3D printer we used in CP5065 ICPD.
No comments:
Post a Comment